Monday 31 December 2012

Happy Crafty New Year!

Well the New Year is almost here, and it's hopefully going to be filled with crafty projects. I'm looking at reorganising my little room as one of my first jobs. I'm still not happy with it. The storage is right ( for the size of the room) but it's the accessibility to everything.
I managed to get many of the projects done this last year as I'd planned. The couple I didn't manage to do are on the top of my list for the forthcoming year.
I have loads of ideas of things to make, along with someold favourites. I'm still knitting mince pies, (I've just had an order for some) but once they're done I shall be working on my spring projects. Here's a sneak preview.

I'll be working on some things for the grandchildren too. I'm so excited about these.
The knitted jacket I'm making for myself is just being sewn up ( a picture will be on the next post) and I shall be starting the next one (hopefully) today.


Whatever you're doing I hope you all have a very happy ( and crafty) New Year!

Friday 7 December 2012

Playing cards

I've finally finished all my knitted Christmas sweet treats for another year. I thought that I might get finished a little earlier than I did, but it wasn't to be.
I've already begun some new spring items, but they can wait until after the festive season.

My Christmas cards are almost finished, I just have five to make, and these will be finished this weekend. The main bulk of the cards which I send, (about 70) are all done. In the end I decided on another theme for them than originally planned. I had intended to use some old Christmas postage stamps. I had already mounted them onto card, ready for die cutting. But then I had another idea after watching something on the telly.


I've been watch Servants, the true story on BBC 2, and on the first programme they visited ERDDIG
We visited there a couple of years ago, it's a beautiful place with so much to take in.
Anyway it was the fabrics and wall coverings which inspired me for my card theme. I wanted a look of gilded pattern on a misty background colour, but worn and faded.
So using white card stock, I used a selected few stamps which I thought would befit the idea.
Using gorgeous Brilliance metallic ink pads in Starlight silver, starlight black, copper and gold, I stamped my images. Some quite random and not all perfect. Once dry I coloured the images on some in metallic watercolour pencils in "Victoriana" colours and then used chalks in similar tones to compliment. I then edged the card with a darker shade of ink to finish off....


...they all turned out just as I wanted.....

....so different from last years' black/silver and brown/gold contemporary cards which i made last year.....

The pictures don't really show the shimmer on the card, I'm really pleased with them.


Once I've finished off the last few, I shall tidy my desk and pack all my card making tools away until after the holidays, then I have some Birthday cards to make.


I've begun a knitted project for myself. I chunky jacket in a gorgeous spicy colour...

I started it last night and am itching to carry on with it, but housework calls, at the moment!
I keep adding to my book of ideas for new projects, but I also have decide to make a colour combination swatch book, which I want to use as a reference for a multitude of things not just paper craft. But that will have to wait, just a while.
I'd better begin my household chores before I get sidetracked!!

Thursday 25 October 2012

Seasonal projects.

Now all the family and friends have had their birthdays I can concentrate on the more seasonal projects. I'm hoping that I can get all my Christmas cards made by the end of November, (last year I managed it) so I hope I can repeat it again. Last year my cards were of a contemporary theme and the colour themes I used were black and silver, brown and gold, aubergine and copper. I used some gorgeous papers and die cut shapes using my Sizzix dies. This year I'm using white card and I shall be stamping and colouring, not sure what though, I haven't made that decision yet. I will be using some other items on some cards. I've been doing some preparation work recently....
....reusing something is all part of the fun. I'll get all my things sorted, stamps, colours, (maybe a bit of glitter) and then decide which theme I will go for then I shall made a start this weekend. My Christmas knitting is still on track, and am keeping up with orders. I've put some mince pies into my Folksy shop....
........along with the Christmas treats selection.........
.....and I'm just finishing off a set of four of these little chaps.....
....I first made some of these about 20 years ago for a school Christmas Fair. Pardon the pun but they sold like hot cakes! I have ideas to adapt the pattern even more, but it will have to wait for now. There's something else which I would like to tackle in the next couple of days, and that's changing my little work room around,again. I'm still not happy with it. it isn't the storage which is the problem, it's how it's all laid out. I have a terrible habit of moving things to a "better" place and then can't find them when I need them. I need to think about how I use this small space and make it more workable, I know it's possible if I just give it some thought. I still haven't sorted the files out on my laptop, I should have done it a few weeks ago and it really need doing, maybe it's another job for this weekend? Forgot to ad..... Here's the hot water bottle cover which I made completely from scraps....
...even the ribbon binding was a scrap. So I proved to myself that I now have another way of using any leftovers, if there are any!!

Tuesday 9 October 2012

Think twice....make once!

It doesn't always pay to be eager, as I've found out recently. On my last post I was so delighted in how my rag rug had turned out...
........and was so eager to use up the left over scraps of fabrics which I now had...
Well my enthusiasm overtook everything else last weekend, and I set aside some time to work on making a hot water bottle cover. here's how the story goes.... First I made a pattern for the cover. I drew around the bottle with an inch or so to spare around edges. I made the pattern from lining paper. I made up the fabric using my scraps. This was so much fun. For the base fabric I used a pillow, ( the filling had been used to make a garden chair cushion) which I cut into two pieces. Using one of the pieces I filled it almost completely with fabric scraps....
...The great thing is, the more I "worked" the pieces into the base fabric the more dense it became. Also, with it being cotton, where I'd used the thinner pieces the thicker ones began to show through. It was looking good, and the reverse side was great too....
...and it felt quite fleecy. Once the piece was complete I cut the pattern pieces out....
...It sewed together like a dream. Where is the picture of the finished article? I hear some say! Well cleverclogs here,( for want of a better word) whilst viewing my pictures on the camera has just manages to delete two frames. Why did I not upload them onto the laptop first heaven knows! So I've lost them in Digiland" now, but I shall have to retake the picture of my finished hot water bottle cover and post it later. But, have no fear because " cleverclogs" has struck again, with an even bigger gaffe this time. Rewind, back to the making of the cover pattern. It would be wise to make sure that you are making a pattern for the correct hot water bottle. because I made a pattern for one which is now defunct. The one I used had perished around the neck seam and was totally useless. I was going to cut some small pieces from the old bottle and attach them to the base of a large plant pot to protect the floor. I should have cut it up and just stored the pieces. Why didn't I realise it at the time!! Anyway my new hot water bottle is wider than the old one by almost an inch. Why they aren't all the same size I don't know. So from making the wrong pieces, deleting pictures from the camera, I'm hoping that today I will be able to get things right without giving myself to much grief and more work. I shall concentrate on the housework and quietly sit and knit later on in the evening, ( hopefully correctly) I do have two birthday cards to make for the weekend. I've got it planned what my themes are. One is for a friend who is a musician. He's going to be 50. The card will be a sort of music review paper, which means using my Serif software. I'm not even going to attempt it today. I have made notes on what I want to make and just hope that I can put it all together correctly. What shall I put it down to, age, or over enthusiasm?

Tuesday 2 October 2012

Rags to Riches....... completed!

My rug is finished, and I'm so happy with it. Here it is placed in front of the living room fireplace, ( just so I could get a decent picture) the light was quite dull.
..the finished size is approximately 27" x 22", that's plenty big enough to fit into my little room. Here's how I finished it off. First of all I decided (whilst I was still making the rug) to keep back half of the white and black fabric, as I'd had an idea for another project. So in the end I used all the striped tee shirting in its place. Once it was all finished I checked both sides to see if it was straight. I did this whilst it was still on the frame...
...better to check it now, before I released it.....
...as you can see, I didn't work in straight lines.it doesn't matter in the slightest. It was okay from the front too....
...there were just one or two pieces which I had to trim to size. 
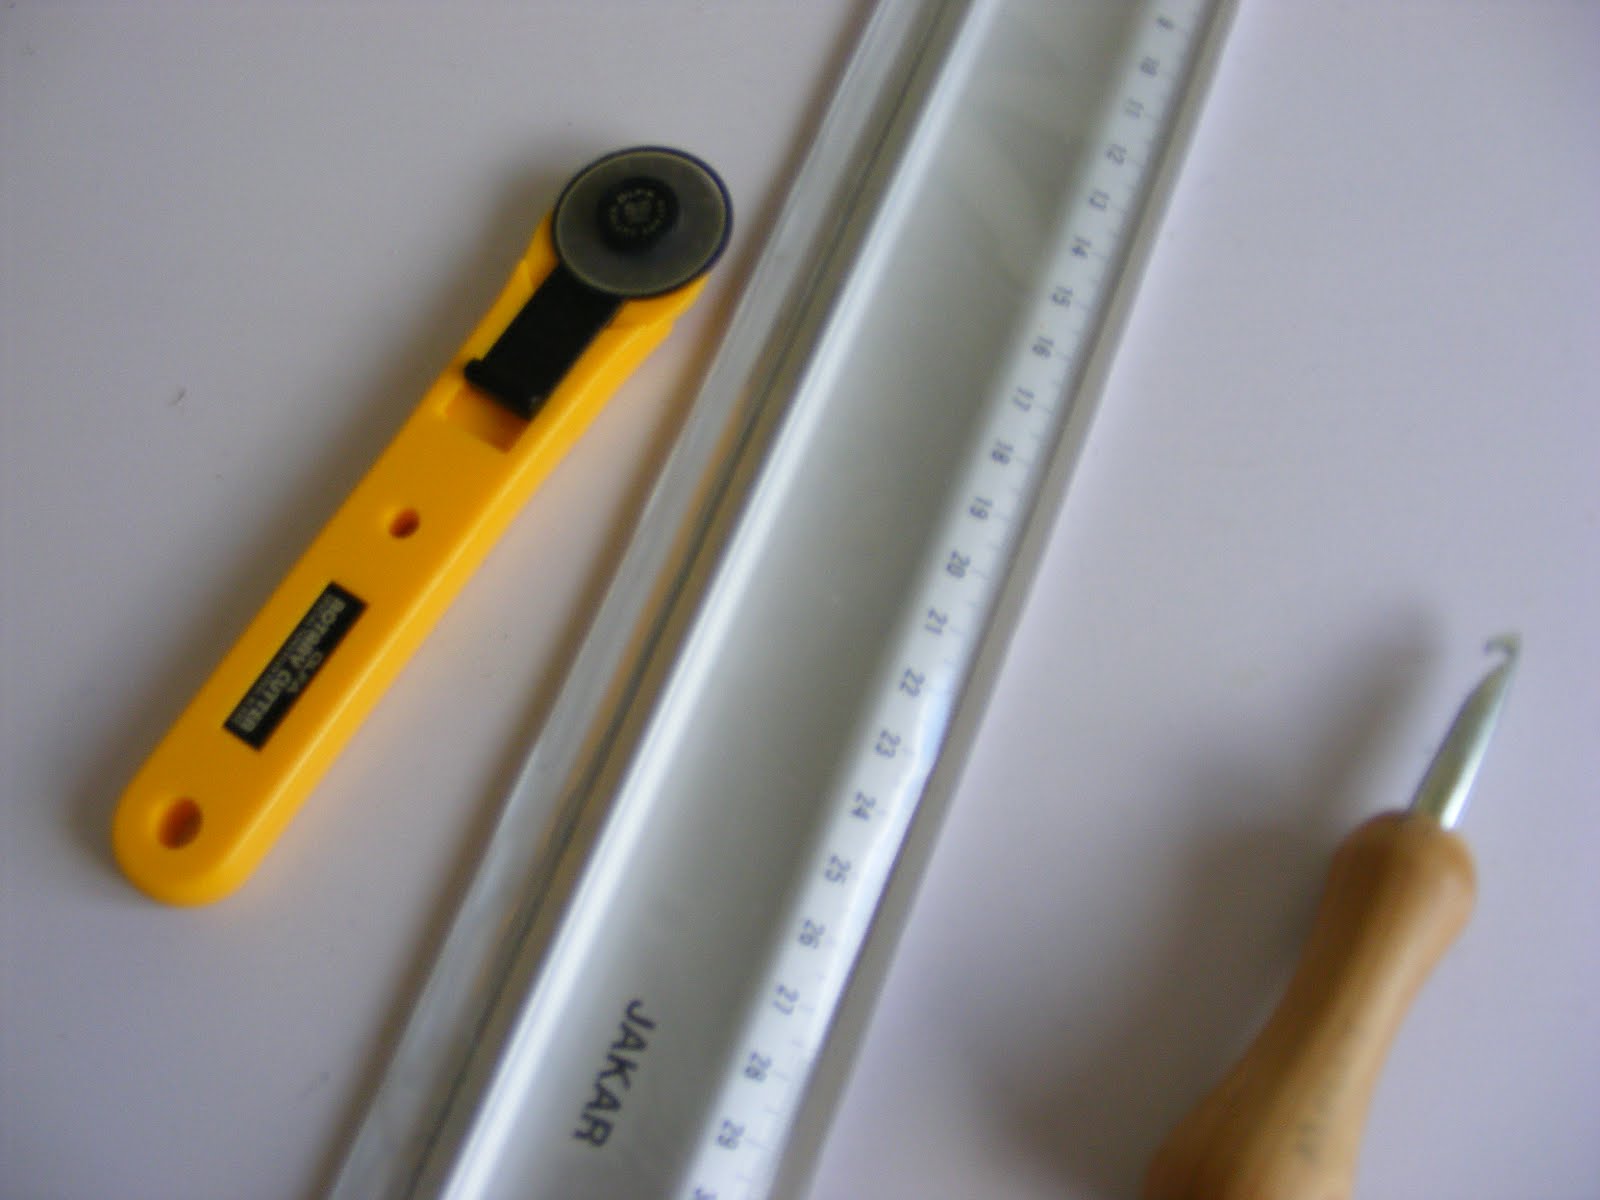
The next thing was to release it from it's frame. I used one of these...
....mine came with the stapler. It wasn't an expensive one, I bought it from Aldi early last year, a great buy at a great price. Once released from the frame I trimmed all around the rug leaving about three inches to turn and stitch.
...as you can see from the picture above, there would have been far too much hessian to fold if I'd left it. Once trimmed I then folded over about half an inch and then folded over again, making sure that my fold was close to the rug edge, (I didn't want any hessian showing from the front) then pinned into place.
Now to stitch into place and to do this I used 4 ply cotton. I do have some fine string ( 4 ply thickness) which was my mums. It was once a huge cone, and she and my dad used it for everything. Mum gave it to me when she no longer used it and there was about half a cone left. I can't find where I've put it, (I've been sorting out I can't find anything) so this was at hand....
...I used it double thickness, and this helps keep the fold into place.
...I laid it flat on my desk to sew, which works better for me as I have arthritis in my fingers and sometimes gripping can be awkward....
....
....I'd got about 8" along when I decided to change my needle. I have a tin with specialist needles in, and I have one of these, I know it as a packing needle...
... it's curved with a flat section and it made it so much easier. I know I could have used latex glue, many people do. But this is the way I was taught to do it, and I'm happy doing it this way. Once all the edges were sewn down I gave it another check.....
...yes, I was very happy with it. Now, if I was going to use it over a fitted carpet I wouldn't use non slip backing, but as it's going to be laid on vinyl flooring I shall.I don't fancy skating across the room! This is what I will use...
...I've actually bought this for another project, ( place mats) but theres enough on the roll for me to cut a few squares off and stitch them to the back of the rug. It's a good mesh fabric so should be easy....
....the whole roll only cost £1, a bargain. My mum used to use the used seals from Kilner jars for the backing on her rugs. She would stick them on with cow gum. ( If you're my age you will know what that is!) So that's my rug done and I'm thrilled with it. I may even make another larger one at some point, for the living room. I shall have to collect quite a few fabrics though. I think it would be nice if I used coat fabrics for that one! Now, with all the off cuts I have from all those tee shirts , two projects are lined up to use them. The first being a hot water bottle cover, and I still have all the off cuts of hessian to use up too. Speaking of hessian I thought I'd show you this, something I made in 1991....
...this is my "goody" bag, as the family affectionately call it. When we are away from home I use it to keep my craft project (I always take something away with me) my notebook, sketch book, pens, and other bits and bobs in. It is made from a piece of hessian and is covered in cross stitch. I used oddments of acrylic yarn which I had left over from making sweaters, ( and I made many in those days)...
....it's fully lined. I used a piece of curtain lining which I had left over from making a pair of curtains.....
...the strap is made from 3" wide webbing which was left over from a costume I made for a panto. It's so nice getting to the end of a project, because there's all the excitement of beginning a new one!

Sunday 2 September 2012

Projects, past present and future...an update

September already. Was it me or did August blow through like a gust of wind? Well let's hope it keeps mild for a few weeks yet as we still have much to do in the back garden. My projects for last month were all of the stitch/fabric variety. I never intended to do any paper crafting and I didn't do any, but there is some on the horizon for this month. With two birthdays coming up and we all know what else is figuring in the crafty world don't we! it's good to be organised, (that's me out then!) Some items I've made have been used and worn until they are no longer serviceable but I still have items which I made years ago, and one of those items is this....
...I made it in 1982 before our son was born. It was made from mostly scraps of fabric which were left over from other projects. The front of the activity book was made from scraps of felt which I had left over from making some soft toys for my sisters children. I though a clown face would be good as a front cover. The next page is...
....a clock which has moveable hands, again made from scraps. The next page is...
...a pocket with zip and top flap. This was made from scraps of a dress which I made in 1979, ( I wish I had more of that fabric now!). On the next page we have...
....a little waistcoat with buttons. Again, the fabrics were left overs from a skirt and lining of a jacket. The buttons were from my button box. The next page reveals..
...a shoe complete with lace. The felt was from a past project and the lace was some which were in the house at the time. ( There were always spare laces in the house then) The base of the activity book was calico and the pieces which I used were leftovers from a play mat which I'd made. We no longer have that! This book is still played with by the grandchildren, it's well used and they love it! I certainly got my monies worth from those fabrics didn't I? Today, I'm finishing my rag rug. I still have some to do but I'm hoping to get it done by the end of the week. I haven't begun the beading work on my Christening gift yet. That's the next thing on the menu. I have managed to get some of these all ready ....
...I'm trying to have some ready and not make to order as I did last year. I also have all my fabrics ready to make some place mats. My desk is clear ( almost) so I shall be ready to get cracking with them by Wednesday, hopefully. Happy crafting one and all!

Monday 20 August 2012

Artistic license... I mean I do it my way!

The rag rug for my craft room is coming along nicely. I'm not spending all my time doing it, especially whilst it's been so warm, as I do have other projects on the go too! So here's the update.....
....I'm not expecting to fill the whole frame ( I'd need a lot more tee shirts for that!) but, it will be a good size when it's finished. As you can see I work from the back. This is the way I was taught to make these peg rugs.....
...you make the hole in the hessian with your chosen rag tool, (more on that in a while) push one end of the strip into the hole, a few threads along make another hole and push the other end of the strip into that hole. Try to make the ends as level as you can. ( I know I shall have a few to trim up as they've been cut a bit too long) and this is what it looks like...
..there are no rules, move over the hessian any way you want......
....as long as you are keeping the lengths between holes as equal as you can. Now, when I was growing up, these types of rugs were called peg rugs. The reason being is that mainly this was used as the rug making tool....
...these are in fact original pegs from the 1950's. They belonged to my late mother, and I have a box full of them....
...to get back to the pegging tool, one of the "legs" was cut off the peg and the remaining leg was sharpened to a point so that it could be used to pierce the hessian. That is how I made my first pegged rug when I was about 10, and it stayed in our kitchen for about 10 years. This is the tool I use now....
..it's has a very short handle which helps as I have arthritis in my fingers. So, I'm really pleased and hope to get it finished in the next week. I decided to go with a random pattern, and patches of colour. I didn't want straight lines or a shape. That's the thing about doing it your way! I have been thinking ahead though, and have begun making these.....
....ready for you know what. I'm trying to be organised, for a change!

Tuesday 7 August 2012

Strips, stacks and ready to go!

Well all the tee shirt pile has now been cut into strips for my rag rug....
...all sorted into colour piles ready....
...I've decided not to use any of the striped fabric in this rug. I think I'll use them for something else, at a later date. I used my rotary cutter on an A2 self healing mat and a large metal ruler, one we usually use for picture framing to cut all the pieces. With the fabric being 100% cotton there was quite a lot of fluff flying about, my desk was covered. But, it soon cleaned up.....
... One thing I will mention is that because I also use my mat for paper craft I made sure that I cleaned it well. Because if it's left it could cause heaps of problems when trying to cut nice neat lines on card. Take a look...
...all those cotton fibres which are trapped in the cut will stay there and the surface will be uneven and not very nice. So I cleaned it with a washing up scourer and warm water. It ended up like this.....
...It only took five minutes. If you use your mat just for fabric, well I suppose it doesn't really matter. Anyway, this is all my waste from all that cutting.....
...I put it in this veg storer whilst I was cutting away, to catch it all. Is it waste?
Will it end up in the recycling or on the compost? No, I'm going to try and use it all, ( if I can). The rug which I am making is for my little craft room. The old fitted carpet is being taken out, ( it's been in there for a number of years) and it's being replaced with some vinyl flooring. (I'm hoping to get an off cut reasonable cheap from somewhere as it's a small room) Then at least I have a wipe clean surface for when I'm on messy or wet projects. So the plan is for the waste from my tees to be used as place mats, or coasters, I'm not sure yet, but I'll find a way of utilising them. If you're wondering if I've spent any money on materials for this rug, well the answer is not really. The hessian I've used for the backing was from a huge piece which was given to me. The tee shirts were all ours , worn until they no longer fit, out of shape, or whatever. The wood for the frame was off cuts from one of our gardening projects. I don't count the cost of my time, as I feel that any time spent doing anything creative is more than worth it. Now I just have to decide on a pattern. I'm going straight on to the hessian, from the centre and see what shapes appear. That all begins this evening.